Role Templates
Role templates are used to create roles with predefined permissions that can be assigned to users. LLMOS currently has two types of role templates:
- Global Roles: These roles are used to grant permissions to users at the system level.
- Namespace Roles: These roles can be assigned to users within specific namespaces. They grant permissions to users within the namespace they are assigned to.
Global Roles
Global roles has predefined roles created by the LLMOS that are available to all users. They are used to grant permissions to users at the system level. Built-in roles can't be modified or deleted. Currently, LLMOS comes with two default Global Roles which are Admin and Standard User.
| Role Name | Description |
|---|---|
| Administrator | Full control over the entire system and cluster components. |
| Standard User | Limited access to the system resources and can only perform actions that are allowed by their role within the assigned namespaces. |
Creating a Custom Global Role
Admin users can add new global roles and assign them to users with the following steps:.
- Log in to the LLMOS dashboard as an admin user.
- Navigate to Users & Authentication > Role Tempaltes.
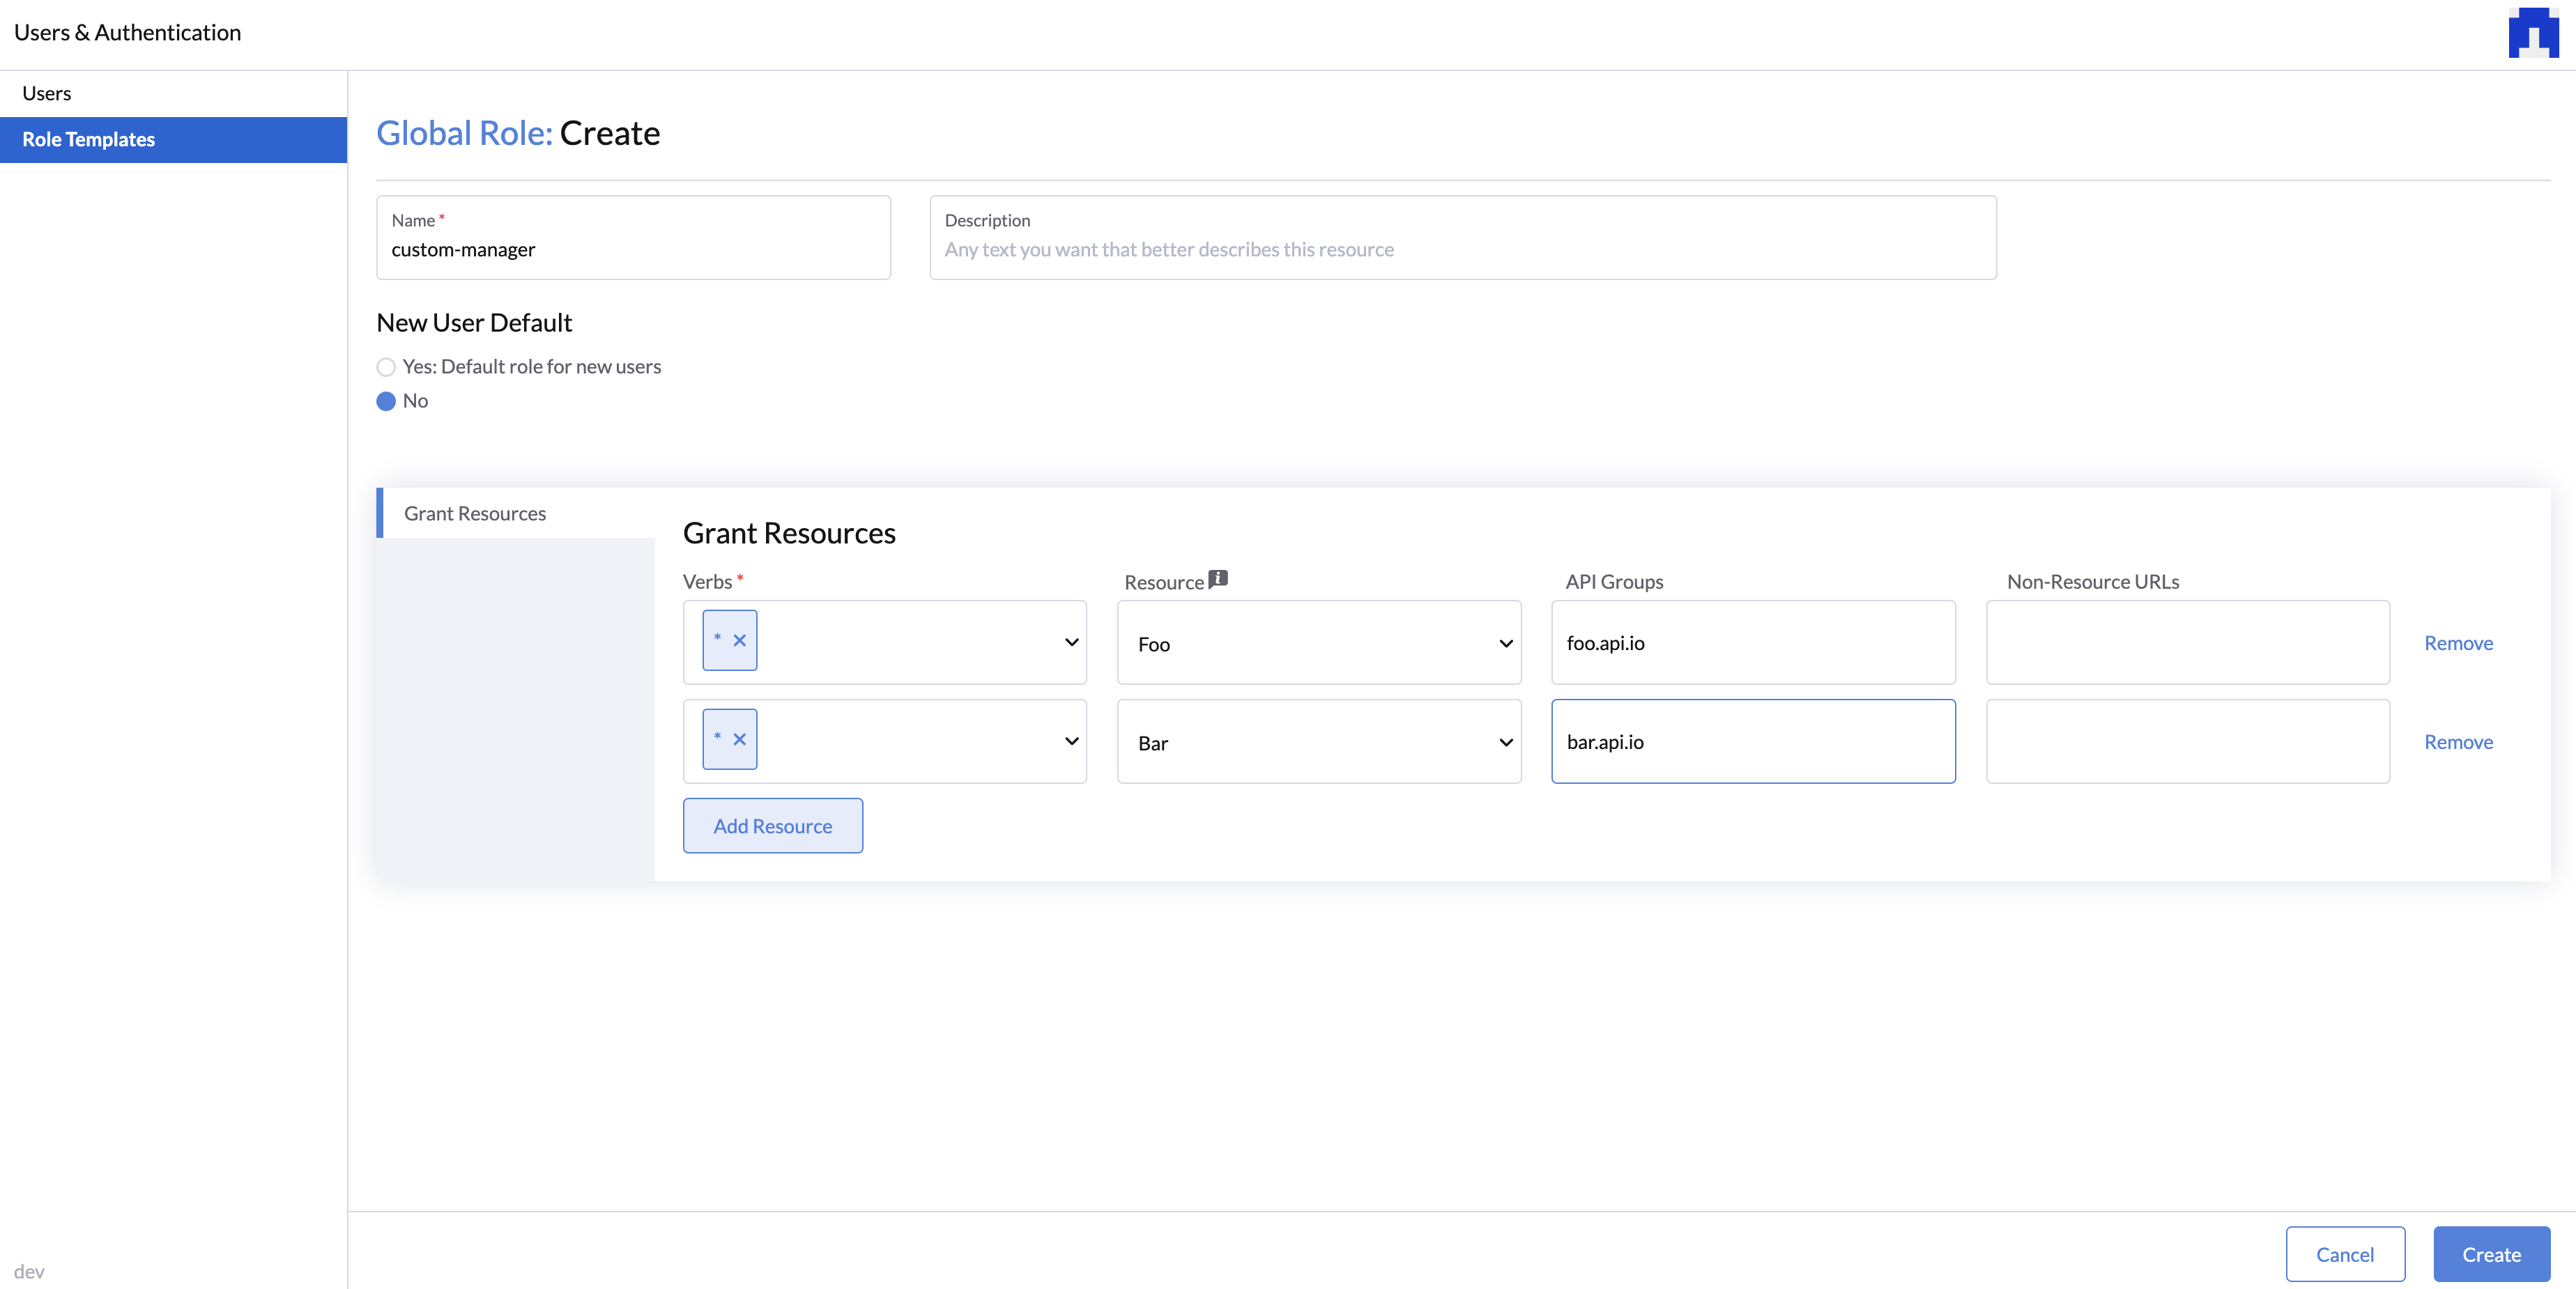
- Click Create Global Role button on the top right corner.
- Specify the Name and Description(optional).
- Select New User Default checkbox if you want to assign this role to new users by default.
- On the Grant Resources tab, add the resources and permissions that you want to grant to the role.
- For more details about the resources and permissions, refer to the Kubernetes RBAC documentation.
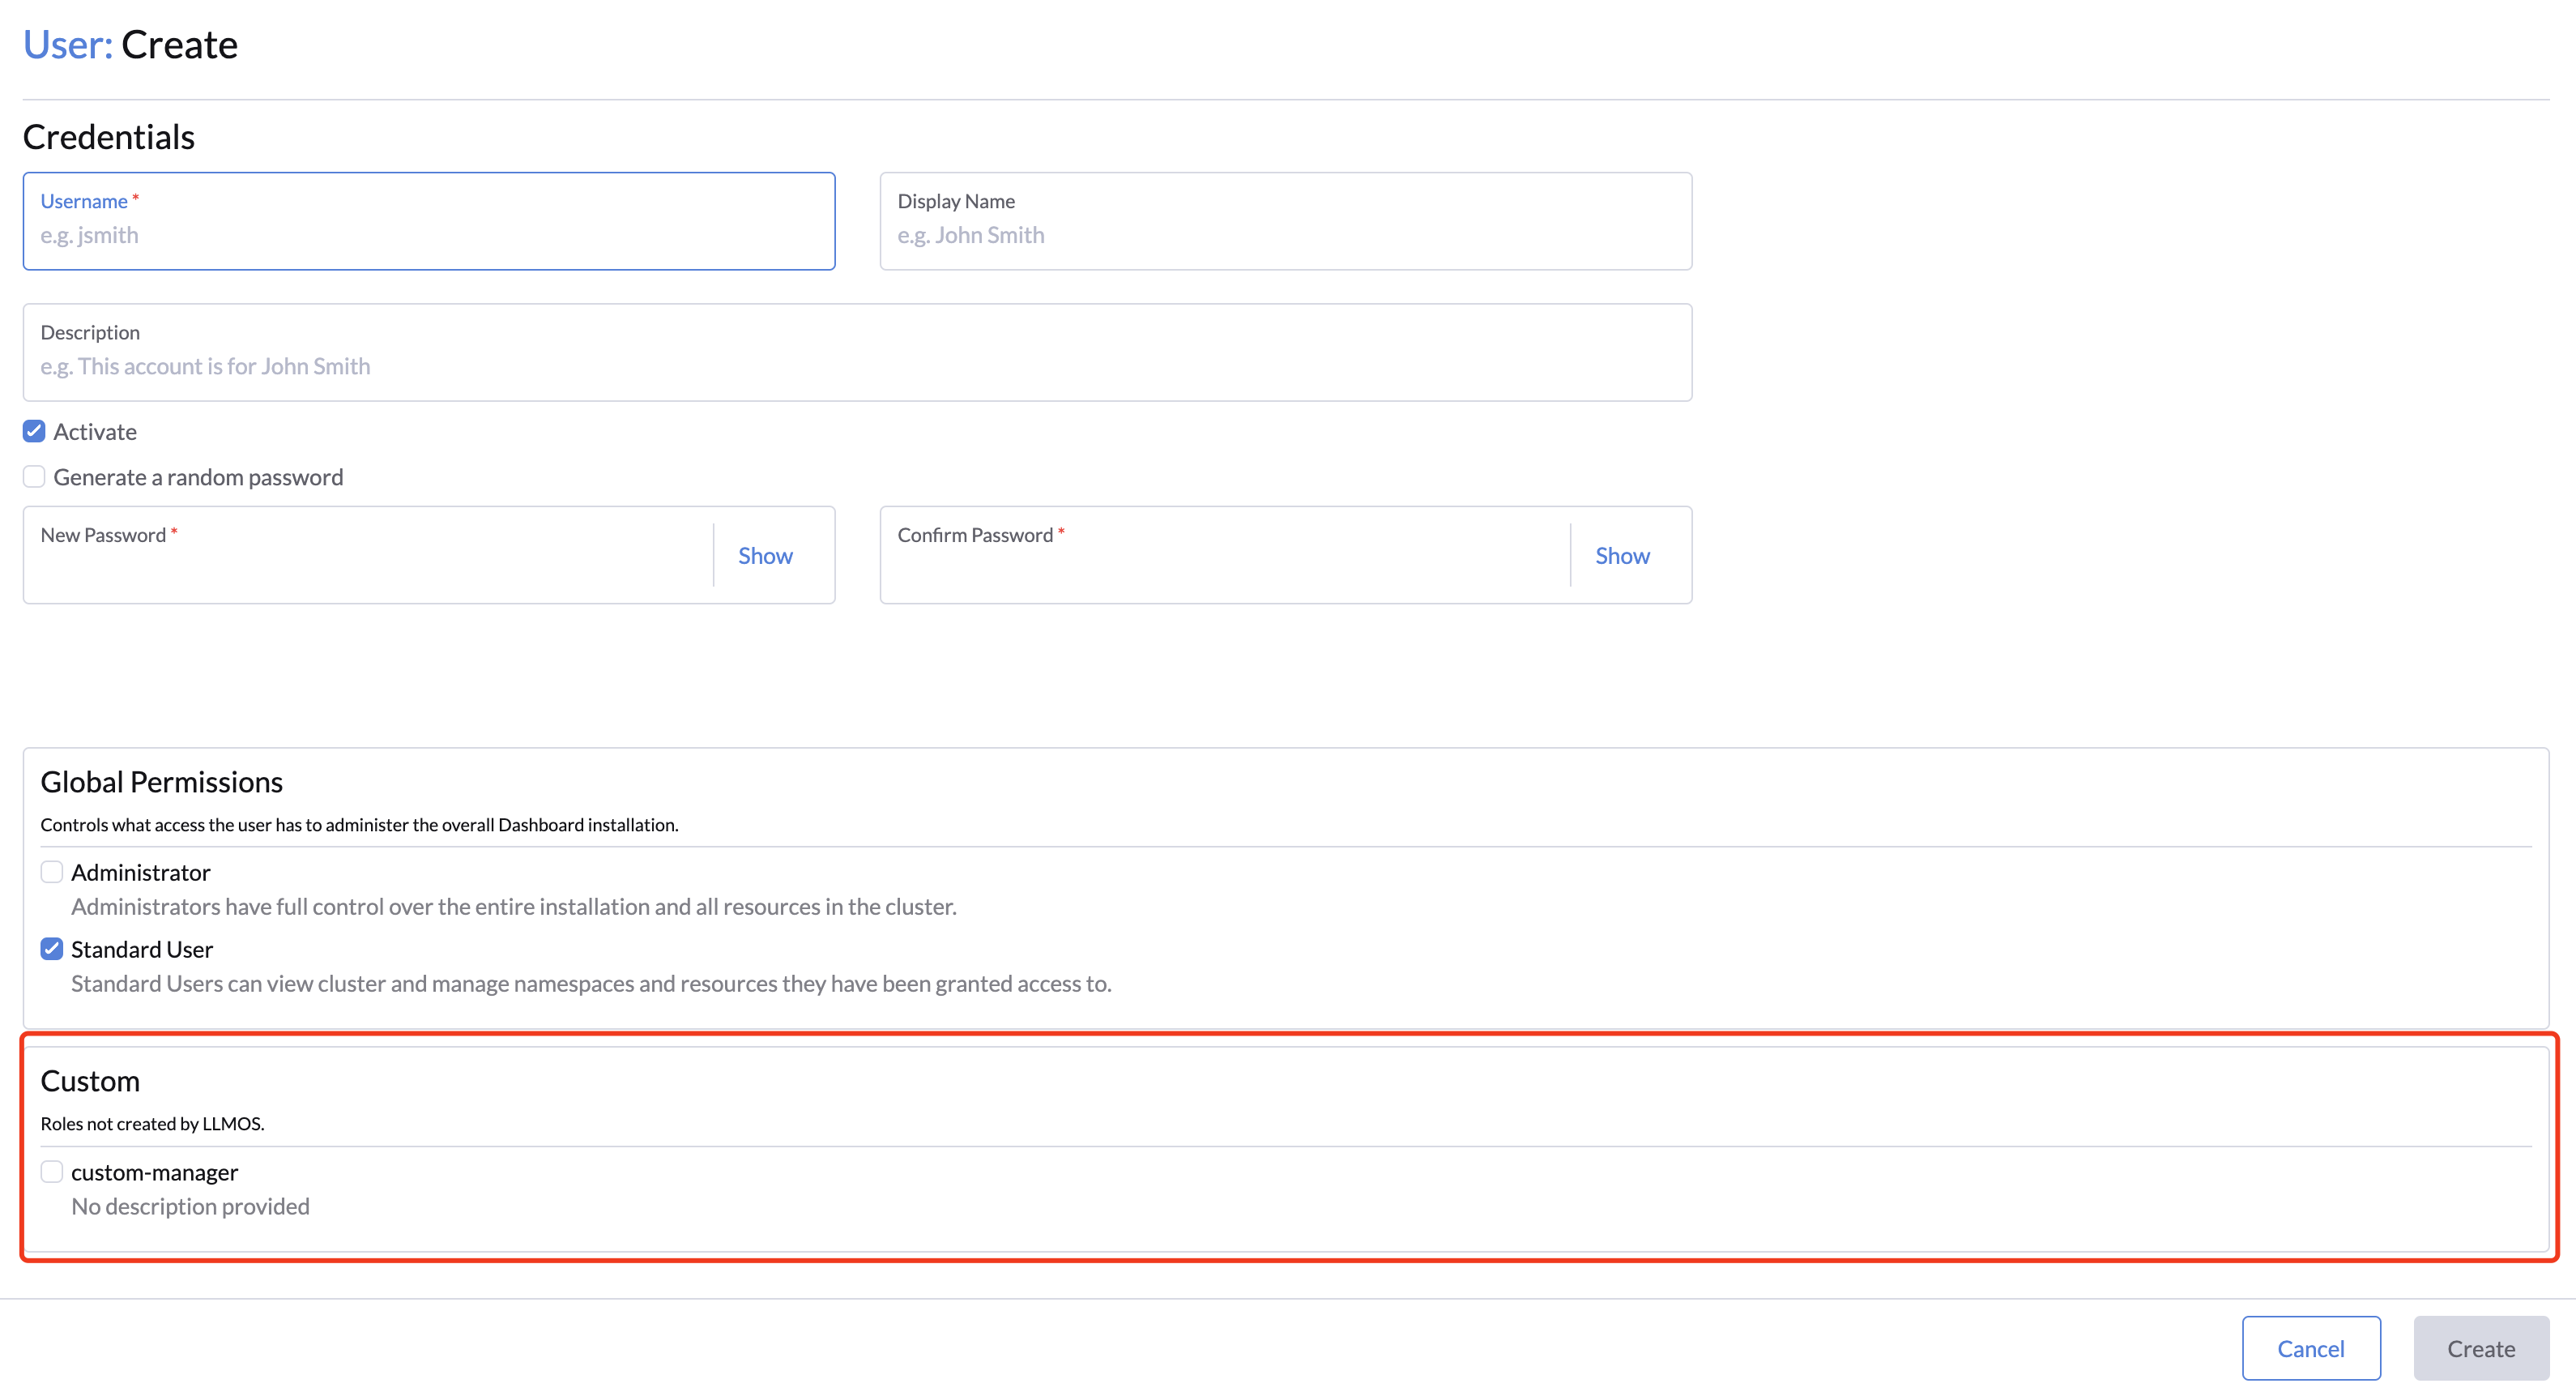
After adding the new global role, you should be able to see the new role listed on the Custom section when creating a new user or editing a existing user.
For global roles, users will have access to the assigned resources in all namespaces they have access to. So if you want to restrict access to the namespace-level, consider creating a custom namespace role template instead.
Namespace Roles
Namespace roles are roles that can be assigned to grant permissions to users within specific namespaces. LLMOS comes with two default Namespace Roles which are Namespace Owner and Namespace Ready-Only.
| Role Name | Description |
|---|---|
| Namespace Owner | Full control over the resources within the namespace they are assigned to. |
| Namespace Ready-Only | Read-only access to the resources within the namespace they are assigned to. |
Creating a Custom Namespace Role
Custom namespace roles will only take effect if they are assigned to users within a namespace. They can be created by admin users with the following steps:
- Log in to the LLMOS dashboard as an admin user.
- Navigate to Users & Authentication > Role Tempaltes and click the Namespaces tab.
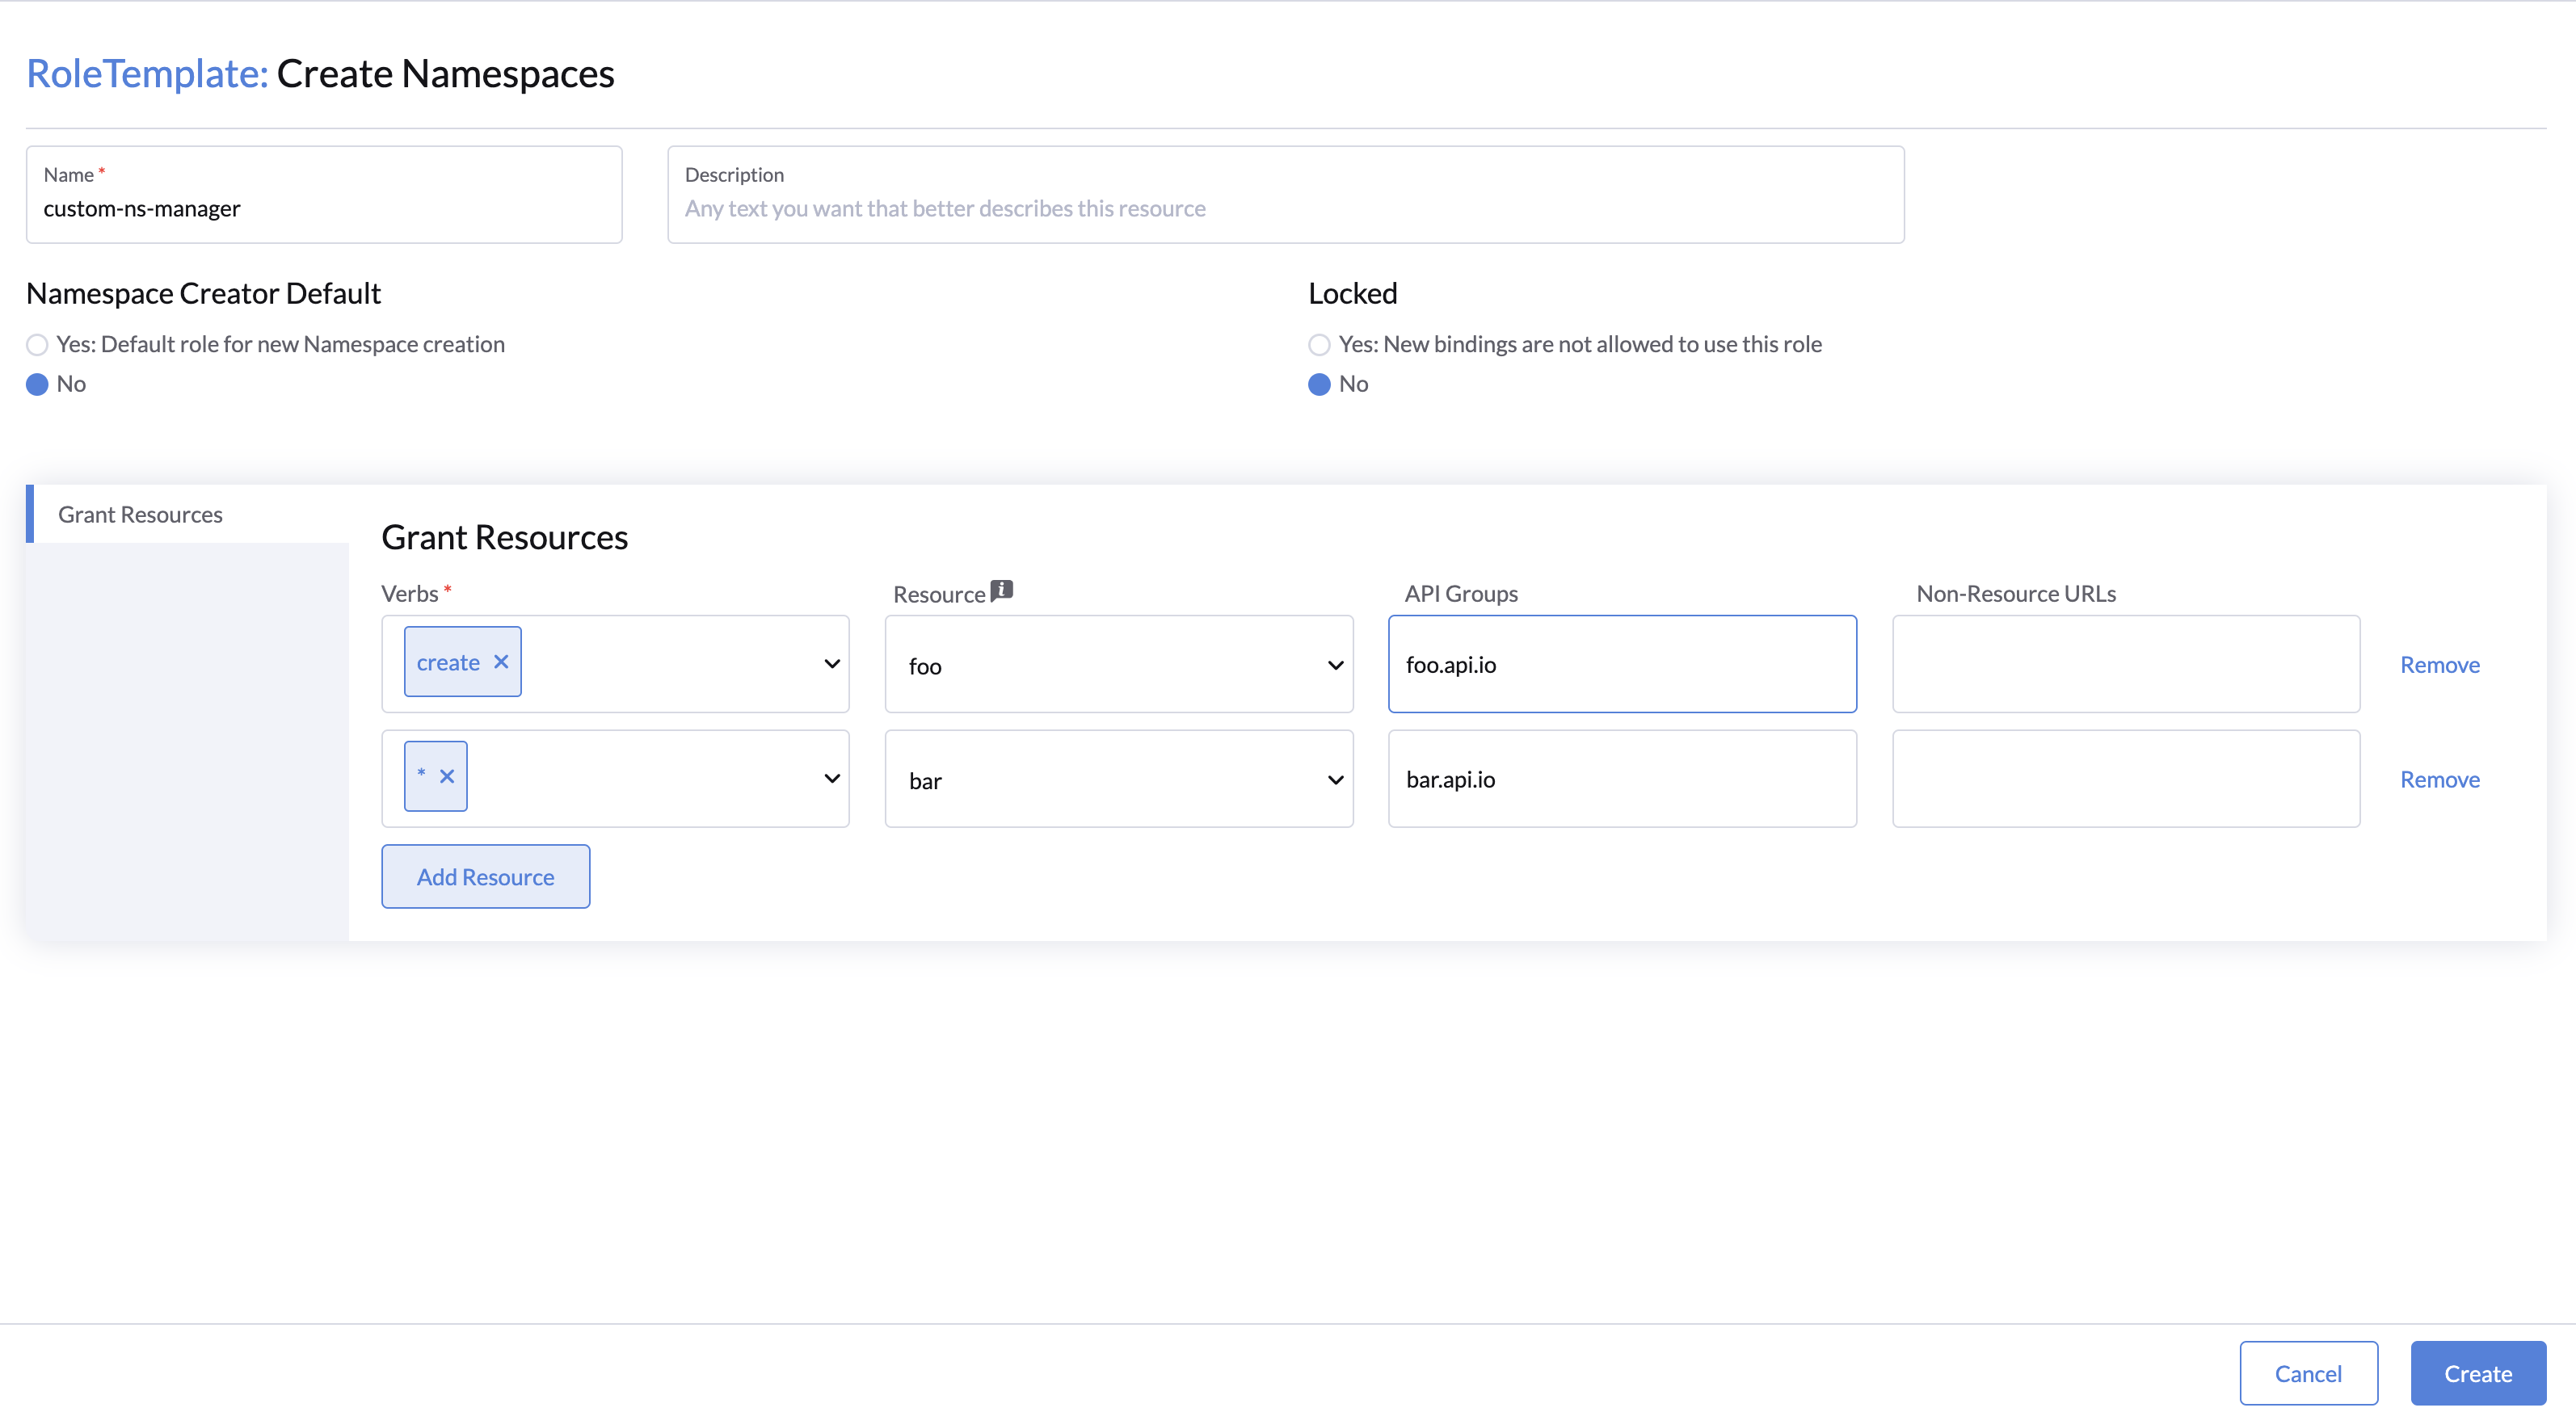
- Click Create Namespace Role button on the top right corner.
- Specify the Name and Description(optional).
- Check the Namespace Creator Default checkbox if you want to assign this role to new namespaces by default.
- (Optional) Select the Locked checkbox if you don't want this role to be used for assigning to namespaces at the current time.
- On the Grant Resources tab, add the resources and permissions that you want to grant to the role.
RBAC Management
Namespace Permissions
To assign a custom namespace role to a user, following the steps below:
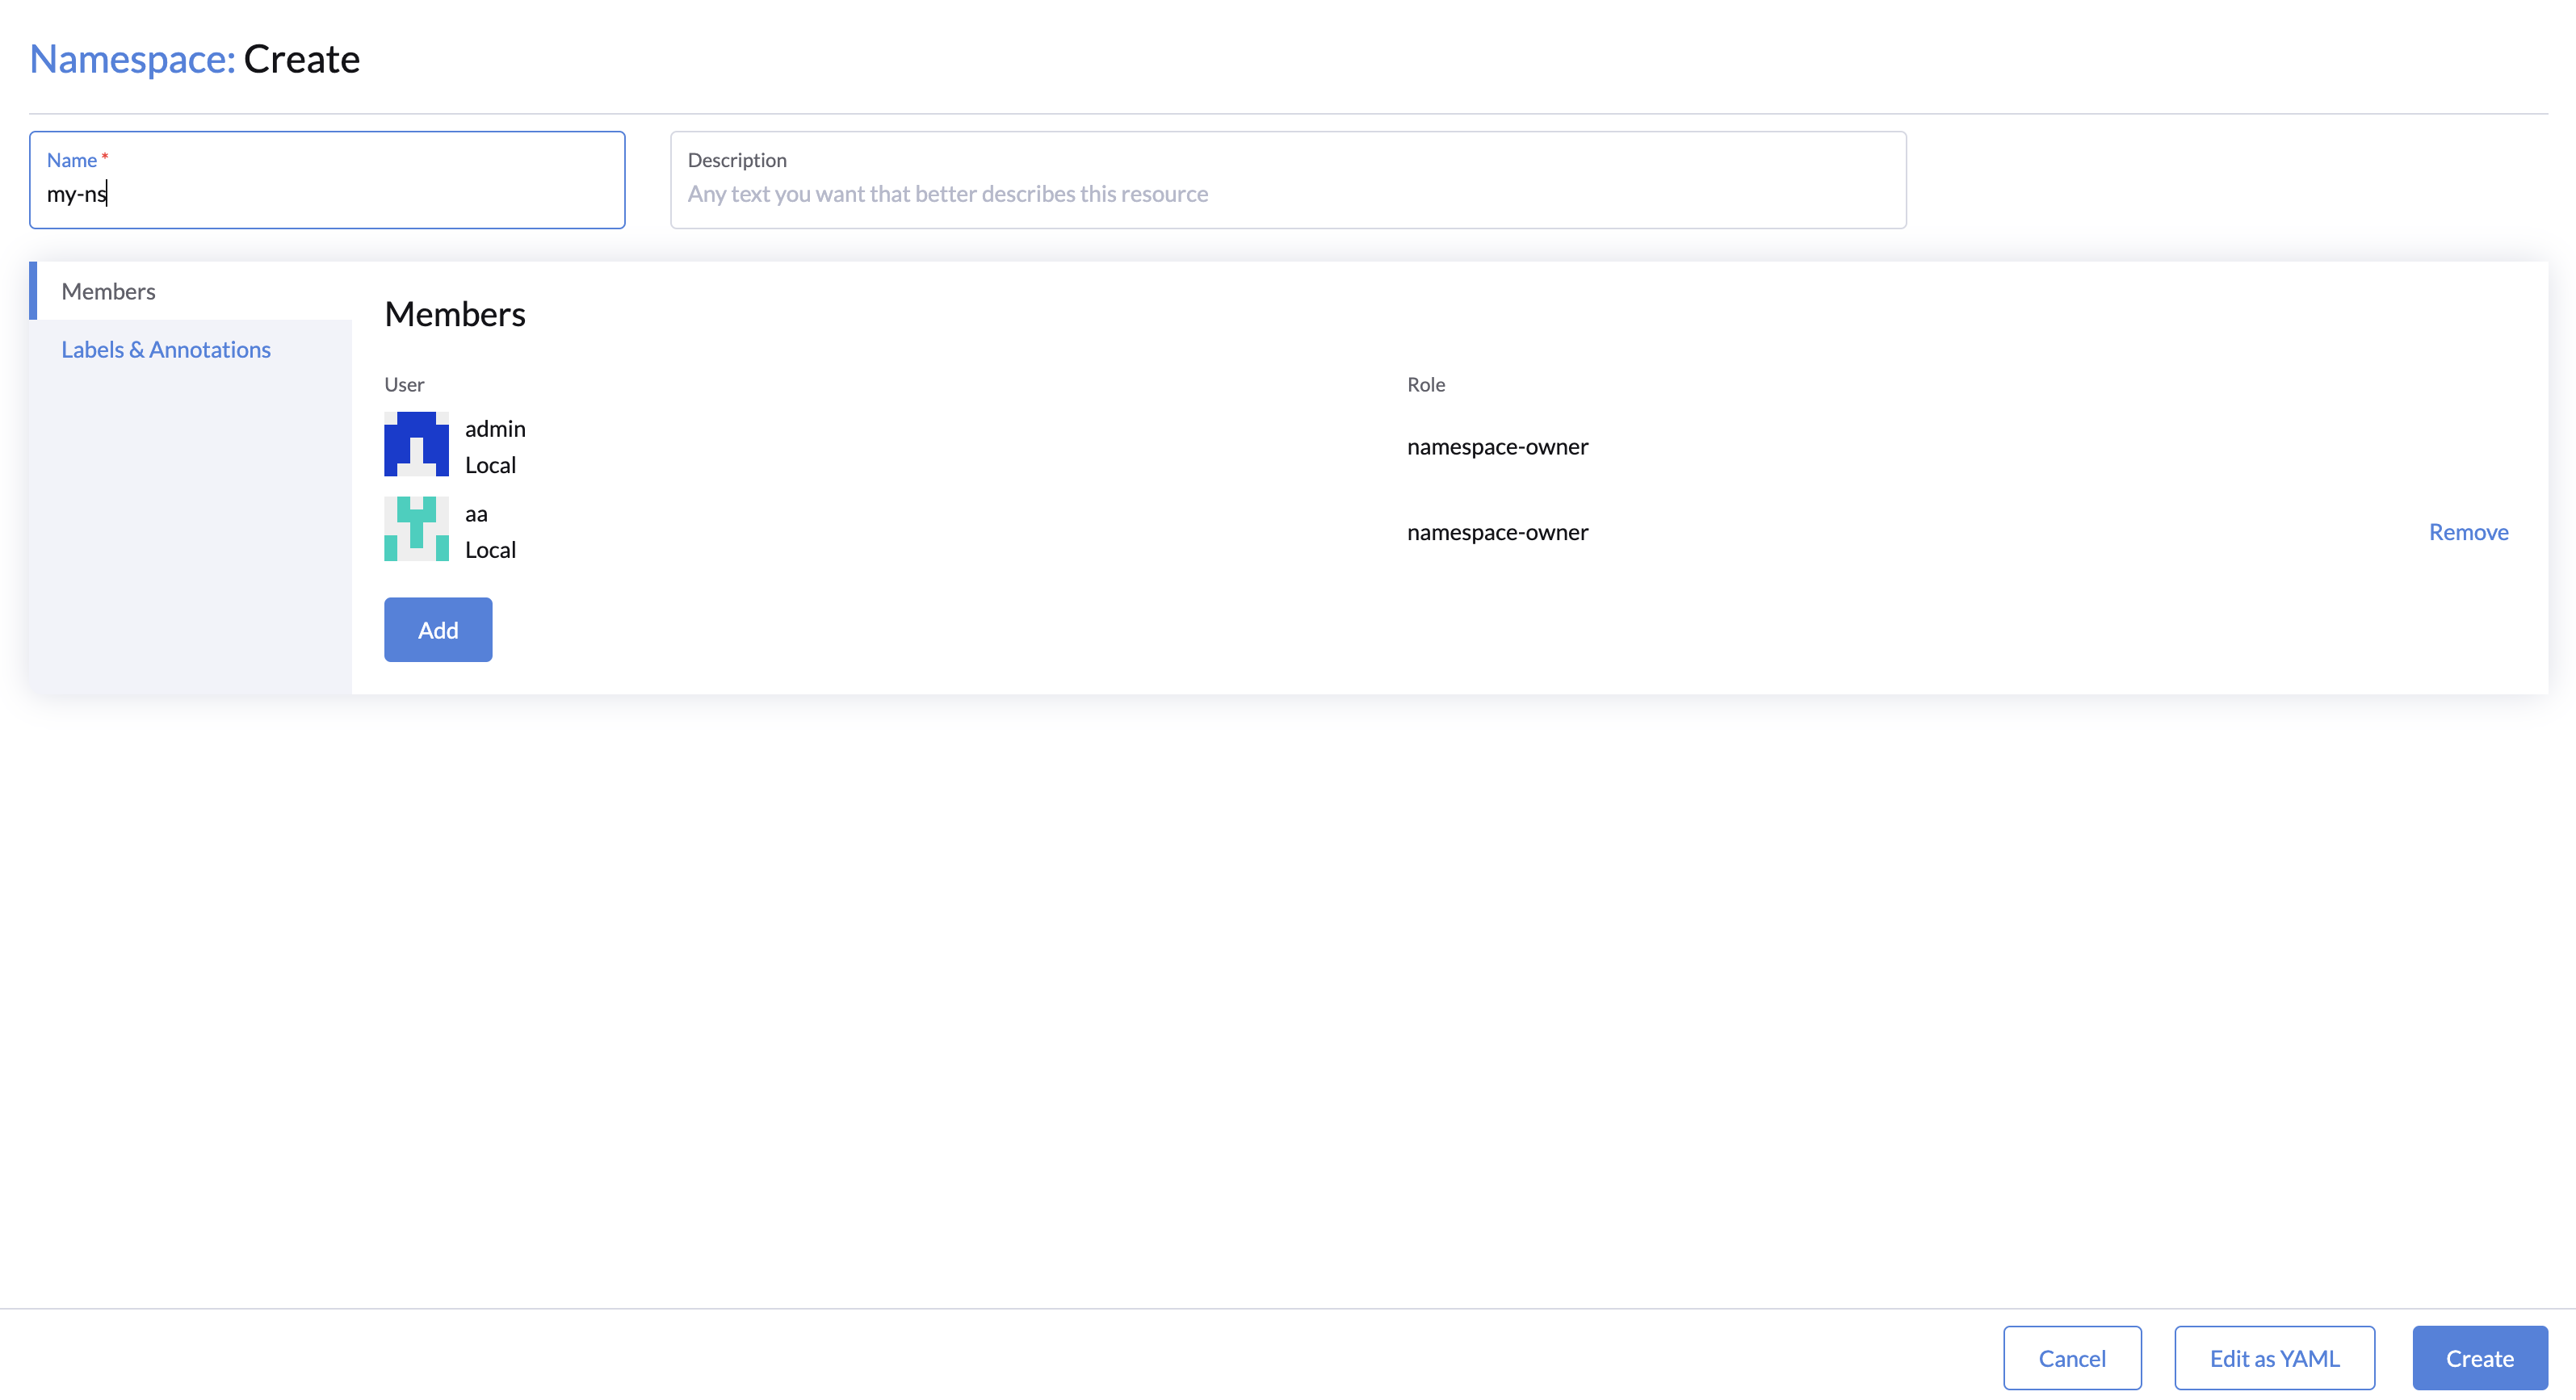
- Navigate to LLMOS Management > Advanced > Namespaces page.
- Click Create or Edit button on the namespace that you want to assign the role to.
- On the Members tab, click the Add button to add a new member.
- Typing to search for the user you want to assign the role to and select the namespace permissions from the list.
- Owner: The user will have full control over the namespace.
- Read-Only: The user will have read-only access to the namespace.
- Custom: Select this option to assign custom namespace roles to the user.
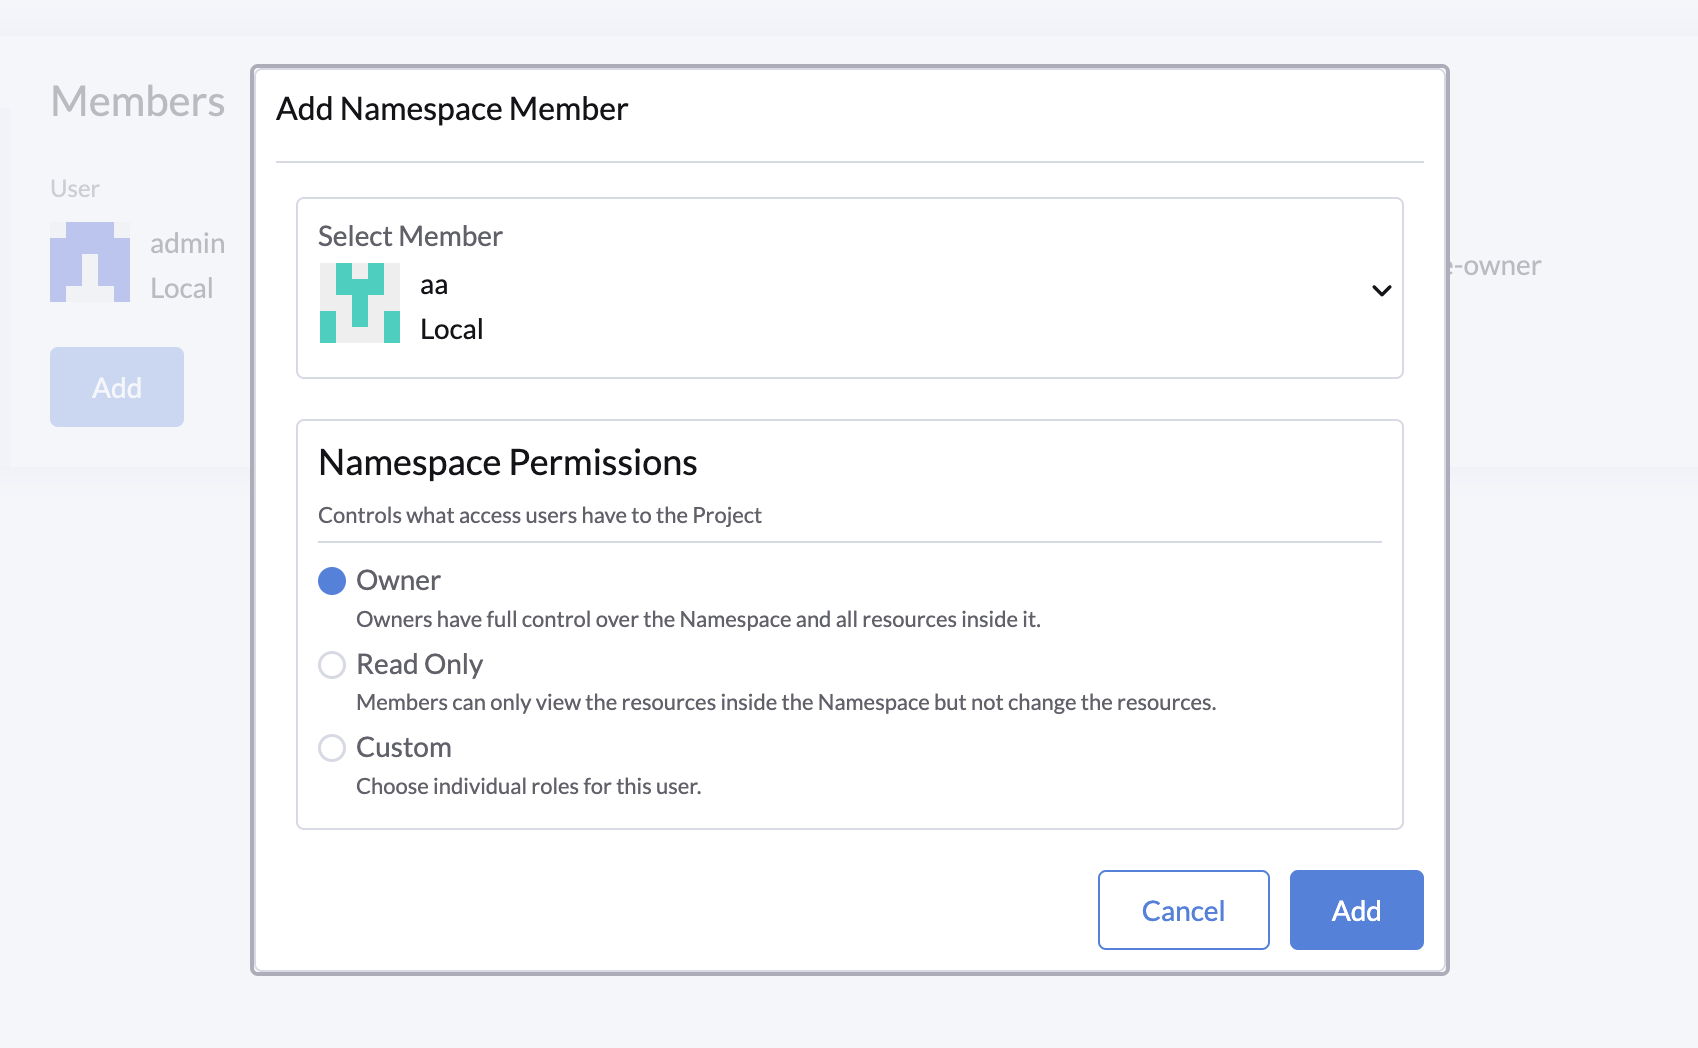
- Click Create and the member should be added to the namespace with the selected role.
- To verify the role permissions, log in to the dashboard as the user, and you should view or manage the resources in the namespace that the role allows you to access.